Showing posts with label Crochet. Show all posts

October 24, 2016

Owen's Blanket

Confession time: I have finished only two (maybe three?) blankets since I got pregnant with Christopher about 18 months ago. I just lost all motivation to do anything, let alone crochet while I was pregnant and then once I had him I had to learn to do everything with one hand which makes crochet very tricky. 

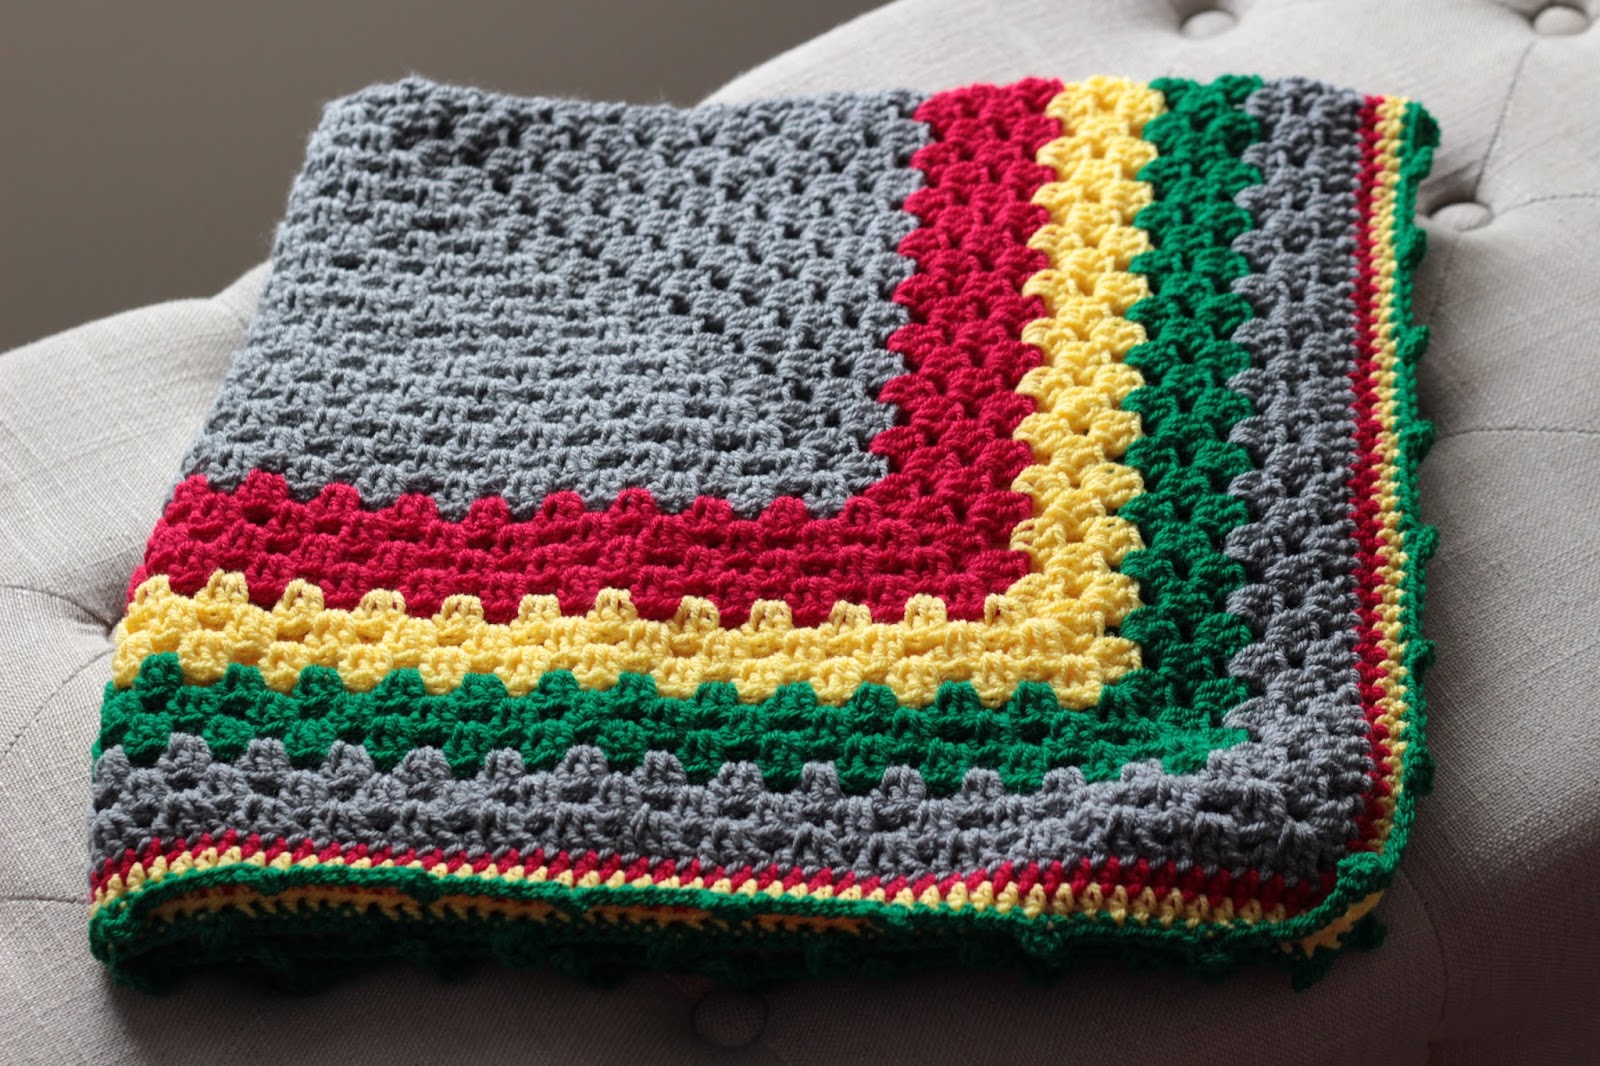
The two blankets I finished are a clam shell pattern blanket I made for Christopher (barely got it done before he was born and he almost never uses it) and this wiggly stripe blanket for my new nephew, Owen. I once made 25 blankets in a year and sent them to everyone I knew having a baby. Sorry to everyone who had a baby in the last 18 months and thought you might get crochet from me! 

I really wanted to get something to my brother and his wife before their little boy was born. This is my first flesh and blood real-deal nephew and I am completely obsessed with him! I pulled out my yarn a couple months before he was due and really forced myself to buckle down and work on this thing. I have been teaching my coworker how to crochet on Mondays for the last six or seven months so she became my weekly motivator/task master.


Christopher also tried to "help" me whenever he could. And by help I mean he tried to eat my crochet hook while I was using it, pulled the yarn out it's skeins, ripped out stitches and taste-tested the finished product. 


Looks good, mom! The fringe is extra nice!
I've made this pattern before way back here and I loved it so much that I kept the blanket in my own stash for future children. It makes the most snuggly, warm blankie especially with all that fringe dripping from the edges. I will definitely make this pattern again, I really enjoy the process of making it as well as the finished product!


The color Petrol from Stylecraft has been in my yarn stash for a long time now and I have been dying to use it. I was going to make it into a girl blanket with a coral and pale blue but that never happened (see excuses above!). I love they way it looks with the pale gray and the almost lime/neon green. It makes me so happy to think about my little nephew all snuggled up in this blanket. My only wish is that I could have delivered it in person!

Owen's Blanket Stats

Yarn: Stylecraft Special DK (Petrol, Silver, Grass Green) one ball of each, Red Heart Soft (White) two balls.
Hook: 4.25mm
Finished size: I forgot to measure :/
Pattern: HERE

"Ma, I promise I wasn't just chewing on the fringe!"

July 24, 2015

Larry's Crochet

I feel like it has taken me a long time to get back into crocheting recently. When I was first pregnant all I did was sleep and try to choke down what little food sounded good to me. I did however finish this blanket before we headed to Utah and Idaho for the 4th of July. I made this one for one of my best friends from Santa Barbara who now lives in Utah with his awesome wife and tiny new baby boy. We got to meet their new baby for a few minutes while we were visiting and he was just so sweet! I always love getting to deliver a blanket by hand!

Oh, and this friend of mine, his name isn't Larry as the name of this post might imply. It's not even close. When we first met I couldn't for the life of me remember his name. I went up to him after church one day and said, "Isn't your name Larry or something horrible like that?" Well, it wasn't Larry but I have called him that ever since. In retaliation for my unwelcome nickname for him he began calling me Louise. After a while people really started to think that our names were actually Larry and Louise. 


I modified a pattern that I found on Pinterest for this blanket. It came from a German (I think) crochet blog and all I really had to go off was a picture of a handwritten diagram of the pattern. I tracked down the link if you want to attempt it too. Instead of doing just three double crochets in each cluster I chose to do 4. I think it made the blanket a lot more thick and almost bubbly. Remember when I did that bobble blanket and it took me a MILLION YEARS to complete? I would say this is a great, much faster alternative to that design.


I once again added a thick layer of fringe to both sides of this blanket. I don't know if you've noticed but I am really into fringe these days! It's easy to do and makes such a big impact. I want to fringe ALL THE THINGS!


I really loved how snuggly this blanket turned out, it's thick and soft and probably won't be put to any use until the winter- it is way too hot in Utah for this right now!

Larry's Crochet Stats

Yarn: Stylecraft Special DK
Colors: White, Silver, Citron, Sherbet
Hook sizes: 5.5 mm for the colored rows, 4.25 mm for the yellow rows

June 19, 2015

Vintage Shells

I have a friend who is vintage to her core. She's quirky and has her own unique style down pat. We used to make fun of her grandma sweaters but somehow she pulled them off with ease. She and I became instant friends one lonely Christmas in Santa Barbara when she picked me up from the airport and we discovered a mutual love for the movie The Master of Disguise. We were inseparable from there on out. 

She's since moved to a few different states, we've both gotten married and she has the cutest little chub of a baby you'll ever see. I started this blanket with someone else in mind but it became so clear to me as I worked it was definitely for this vintage friend of mine. 


There is just something about these colors that says 1970's to me. I hope it also reads a little modern though. I think my favorite part of making this blanket was putting all the fringe on. I did a little tutorial on it over HERE. This might be the fringe-iest blanket I've ever made and the result is just so satisfying!


Vintage Shells Stats


Hook Size: 6mm
Yarn/colors: Red Heart Soft- White, Orange. Stylecraft Special DK- Lipstick, Sherbet, Meadow, Walnut, Saffron
Pattern/Tutorial HERE

May 19, 2015

Peaches and Plum Crochet

I tend to buy yarn for specific projects I have in mind but sometimes I just like a color or I order too much of something and I've ended up with a whole bin of colors I don't have a plan for. Every once in a while I get out this stash of yarn and lay it out on the living room floor. Thomas loves when I do this. I spend hours hemming and hawing over the colors, trying out new combinations in an attempt to use up some of these odds and ends. This color combination is the result of one of these yarn chaos sessions. I am obsessed with how this blanket turned out! I think it's just the right mix of modern and classic.


The pattern for this blanket is from Raverly and it's a free download! Woo! You can get it HERE! I like the look it created, a little twist on a classic chevron pattern. It's basically two rows of a regular chevron stitch followed by two rows of a granny chevron stitch. I love that it ends up looking a little like lace or eyelet- so girly!


It's going to be difficult to give this blanket away, I might have to make a duplicate for my own stash of baby blankets.

Peaches and Plum Stats

Yarn: Stylecraft Special DK
Colors: Cream, Apricot, Plumb, Silver
Pattern: Here


May 13, 2015

Rasta Crochet

When I heard that my cousin Keith and his wife Les were expecting I was really excited, probably more than when any of my other cousins have had a kid- sorry guys! Les served a mission for the LDS church in Jamaica and loves rasta color things so I decided to really step out of my baby blanket box and make something a little different for them. I think it paid off! 


I used the picot stitch edging on this blanket, I seem to use it a lot on granny squares. It just seems like the perfect way to add a little bit of texture to the repetitive pattern of the square.


I was able to hand deliver this blanket to my cousin and his wife while we were in Utah for my brother's wedding. I normally mail my blankets to people so it was sweet to be able to give one in person. Les gave birth to a beautiful baby boy a couple weeks later and he's been snuggled up in this blankie ever since. My heart seriously explodes when people send me pictures of babies in something I made. It kills me ever time!


Love you baby Miles, can't wait to hold you soon!

**Update** I have received so many hilarious pictures of baby M in his blanket, these are some of my favorites:


Rasta Square Stats

Yarn- Stylecraft Special DK from Deramores.com
Colors- Gray (2 balls), Lipstick, Citron, Green (one ball each)
Hook- 6mm
Finished size- about 36" square

April 21, 2015

Fringing a Blanket

I've talked about how much I detest weaving in the ends of yarn after I finish crocheting a blanket. I just do not have the patience for it. I feel like stripes are sort of my jam right now and that means I usually have way too many ends to even think about weaving in (shudders). 

As I was watching General Conference a few weeks ago I finished up a blanket and decided to add some thick fringe to it's edges to avoid the weaving. I snapped a few pictures of the process and though they might be helpful for someone out there trying to avoid the same fate as me.

Step 1: Tie each of the yarn ends to the one closest to it.


Step 2: do a quick single crochet along the edge of the blanket, pulling the tied colors through the top of each stitch. I usually pull them through all at once after I finish the row of SC. Crocheting this border helps the edge look more finished and gives you something to anchor the fringe tassels to.

Step 3: Cut your fringe. I usually wrap my yarn around a DVD case a bunch of times and then cut along one edge so that I have a whole pile of uniform length yarn pieces. This makes it so there is a lot less trimming in the end.


Step 4: Working from the back side of your blanket, take a small crochet hook and slip it into the stitch where your blanket yarn ends are coming through the line of SC you make in step 2. 


Step 5: Place three strands (or more, depending on how thick you want your fringe) of your pre-cut fringe around the hook and gently pull it through the stitch.


 Step 6: Once you have a loop pulled up, gather the fringe ends and the blanket yarns and pull them through the loop like this:


Pull tight and make sure that the knot is secure.


 ^^This is how your knot should look on the back side of your work^^


 ^^And this is how it will look on the front^^

Step 7: Trim up the edges to a uniform length once all the fringe is attached.


Step 8: Satisfyingly run your hands through the fringe, swish it around and show it to your husband exclaiming, "It's so fluffy and soft!" 


Do you have any strategies to avoiding weaving in ends? Let me know in the comments!
Related Posts Plugin for WordPress, Blogger...